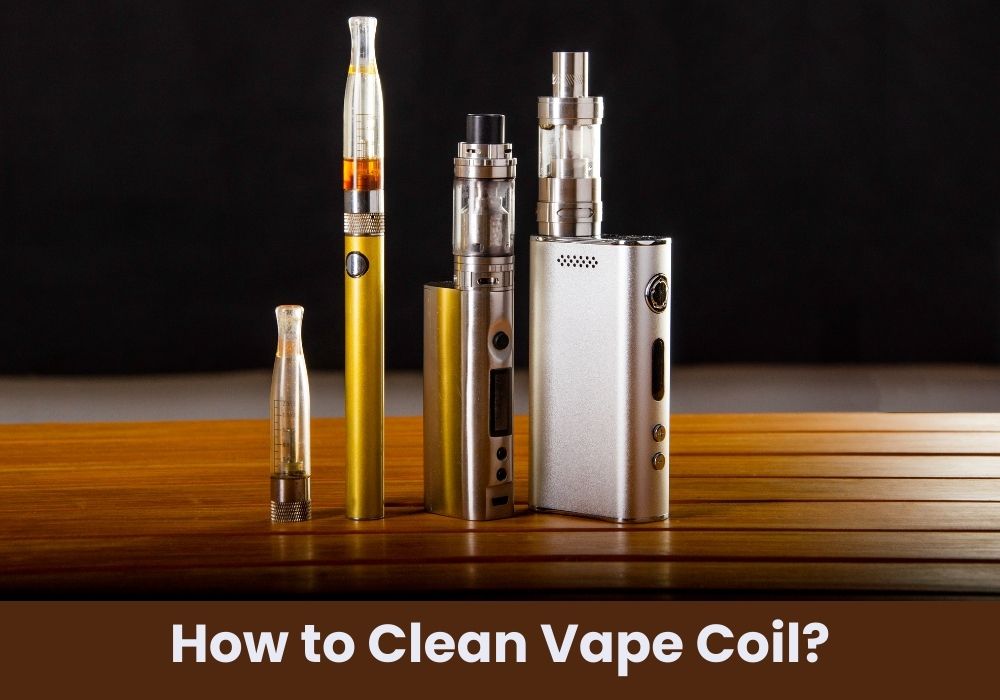
Cleaning your vape coil is an essential part of maintaining your vaping device. Vape coils are responsible for heating up the e-liquid and turning it into vapor, but over time, they can become clogged with residue, affecting the flavor and vapor production of your device. In this article, I will explain how to clean your vape coil to ensure optimal performance and flavor.
Before we dive into the cleaning process, it’s important to note that not all coils are designed to be cleaned. Some coils are disposable and should be replaced when they become too clogged or burnt out. However, if you have a rebuildable atomizer or a sub-ohm tank with replaceable coils, cleaning your coils can help extend their lifespan and save you money in the long run.
There are several methods for cleaning your vape coil, including using warm water, alcohol, or specialized cleaning solutions. Each method has its benefits and drawbacks, so it’s important to choose the one that works best for your device and preferences. In the following sections, I will detail each cleaning method and provide step-by-step instructions to ensure you get the most out of your vape coil.
Understanding Vape Coils
Vape coils are an essential component of any vaping device. They are responsible for heating up the e-liquid and producing the vapor that you inhale. Understanding the different types of vape coils available and how they work can help you to make the most of your vaping experience.
There are two main types of vape coils: pre-built and rebuildable. Pre-built coils are ready to use straight out of the box and are often made of kanthal wire. Rebuildable coils, on the other hand, are designed to be taken apart and rebuilt with your own wire and cotton.
Vape coils can also vary in resistance, which affects the amount of power needed to heat them up. Low resistance coils require more power and produce more vapor, while high resistance coils require less power and produce less vapor.
It’s important to note that vape coils have a limited lifespan and will eventually need to be replaced. Signs that your coil needs replacing include burnt taste, reduced vapor production, and a gurgling sound.
SPIRITBAR Katana BP10000
- Slender, leather-textured body reminiscent of a katana handle for an authentic samurai feel
- Unique samurai-inspired e-liquid flavor - fruity yet not too sweet, with a luxurious, elegant aroma
- Powerful 650mAh rechargeable battery for extended vaping time
- Large 18ml e-liquid capacity and 10,000 puff capacity
- Advanced mesh coil and e-liquid & power display screens for optimal vaping experience
The special juice captures the essence of the samurai spirit with its rich, smoothly pulsating flavor that brings new satisfaction with every puff. The device's slender, leather-textured design evokes the grip of a samurai's katana, making this product a perfect choice for beginner vapors.
Properly cleaning your vape coils can help to extend their lifespan and improve their performance. Refer to the other sections of this article for tips on how to clean your vape coils effectively.
Signs of a Dirty Vape Coil
As a vaper, it is important to know when your vape coil needs cleaning. A dirty vape coil can affect the flavor and quality of your vape, and it can also shorten the lifespan of your coil. Here are some signs that your vape coil needs cleaning:
- Burnt taste: If you notice a burnt taste when vaping, it is a sign that your coil needs cleaning. The burnt taste is caused by residue buildup on the coil, which can affect the flavor of your vape.
- Decreased vapor production: If you notice a decrease in vapor production, it is a sign that your coil needs cleaning. Residue buildup on the coil can clog the airflow, which can affect the amount of vapor produced.
- Leaking: If your tank is leaking, it could be a sign that your coil needs cleaning. Residue buildup on the coil can cause the tank to leak, which can be messy and wasteful.
- Coil discoloration: If you notice discoloration on your coil, it is a sign that it needs cleaning. Discoloration is caused by residue buildup on the coil, which can affect the lifespan of your coil.
Regular cleaning of your vape coil can help prevent these issues and keep your vape running smoothly.
SPIRITBAR Jack’s Flask 9000 Puffs
- Stylish pirate flask-shaped body providing an exciting vaping experience
- Delivering up to 9000 puffs per device
- 20ml e-liquid capacity with 50mg nicotine strength for satisfying throat hit
- Specialized pirate-themed e-juice flavors for rich, swirling taste
- Premium mesh coil optimizes flavor profile for maximum vaping enjoyment
This disposable vape captures the daring spirit of the high seas with its flask styling and signature pirate e-juice flavors. The extraordinary battery life provides 9000 indulgent puffs for extended vaping pleasure. Live boldly and freely with the Jack's Flask - a legendary vaping experience fit for a pirate's adventures.
Materials Needed for Cleaning
Cleaning your vape coil is an essential part of maintaining your vape’s optimal performance and extending its lifespan. To clean your vape coil, you will need the following materials:
- Replacement Coils: Before you start cleaning your vape coil, it is essential to have replacement coils on hand. This is because cleaning your vape coil can sometimes damage it, and you may need to replace it.
- Rubbing Alcohol: Rubbing alcohol is a crucial component of cleaning your vape coil. It is used to dissolve any buildup on the coil and to disinfect it.
- Cotton Swabs: Cotton swabs are used to clean the coil. They are an effective tool for removing any buildup on the coil.
- A Bowl or Container: You will need a container to hold the rubbing alcohol while you clean your vape coil.
- Water: You will need water to rinse off the coil after cleaning it with rubbing alcohol.
- Gloves: Gloves are optional, but they can help protect your hands from the rubbing alcohol and any residue on the coil.
It is important to note that not all vape coils are created equal, and some may require additional materials or steps to clean properly. Always refer to the manufacturer’s instructions for specific cleaning recommendations.
In the next section, I will provide a step-by-step guide on how to clean your vape coil using these materials.
How to Remove the Vape Coil
Removing the vape coil is the first step in cleaning it. Here are the steps that I follow:
- Start by disassembling your vape tank. Remove the tank from your mod and dispose of any remaining e-liquid in the tank.
- Unscrew the base of the tank where the coil is located.
- Gently pull out the coil from the tank. Be careful not to damage the coil or the tank.
- If the coil is stuck, try using a pair of pliers or tweezers to gently wiggle it loose.
- Once the coil is removed, inspect it for any signs of damage or wear. If it looks damaged, it may need to be replaced instead of cleaned.
It’s important to note that not all vape tanks are the same, so the process of removing the coil may vary slightly depending on the tank you have. Be sure to consult your tank’s manual or manufacturer’s website for specific instructions.
With the coil removed, you can now proceed with cleaning it.
Cleaning Process
I have found that cleaning vape coils is a simple process that can be done at home with a few basic tools. Here is how I clean my vape coils:
- Disassemble the vape tank and remove the coil.
- Rinse the coil under warm water to remove any loose debris.
- Soak the coil in warm water for a few hours. This will help to dissolve any remaining debris and reach even the smallest crevices.
- Remove the coil from the water and dry it with a paper towel or microfiber cloth.
- Use a toothbrush or a coil cleaning tool to gently scrub the coil. This will help to remove any remaining debris and improve the coil’s performance.
- Rinse the coil again under warm water to remove any debris that was loosened during the scrubbing process.
- Dry the coil again with a paper towel or microfiber cloth.
- Reassemble the vape tank and test the coil to ensure that it is working properly.
It is important to note that cleaning vape coils should be done regularly to maintain optimal performance. Depending on how often you use your vape, you may need to clean your coils every week or every few weeks.
Overall, cleaning vape coils is a simple process that can help to improve the performance of your vape and extend the life of your coils.
SPIRITBAR Katana BP10000
- Slender, leather-textured body reminiscent of a katana handle for an authentic samurai feel
- Unique samurai-inspired e-liquid flavor - fruity yet not too sweet, with a luxurious, elegant aroma
- Powerful 650mAh rechargeable battery for extended vaping time
- Large 18ml e-liquid capacity and 10,000 puff capacity
- Advanced mesh coil and e-liquid & power display screens for optimal vaping experience
The special juice captures the essence of the samurai spirit with its rich, smoothly pulsating flavor that brings new satisfaction with every puff. The device's slender, leather-textured design evokes the grip of a samurai's katana, making this product a perfect choice for beginner vapors.
Drying the Vape Coil
Once you have rinsed your vape coil, the next step is to dry it. Drying the coil is a crucial step in ensuring that it functions properly and lasts longer. Here are some tips to help you dry your vape coil:
- Gently pat dry the coil with a clean towel. Be careful not to apply too much pressure as this can damage the coil.
- Allow the coil to air dry for a few hours. You can place the coil on a clean towel or paper towel to help absorb any excess water.
- If you’re in a hurry, you can use a hair dryer on the lowest setting to dry the coil. Make sure to hold the hair dryer at least six inches away from the coil to avoid damaging it.
It’s important to make sure that the coil is completely dry before using it again. Any residual moisture can damage the coil or affect the taste of your e-liquid.
In addition to drying the coil, you may also want to consider cleaning the rest of your vaping device. A clean device will not only function better, but it will also provide a better vaping experience.
Reinstalling the Vape Coil
After cleaning the vape coil, it’s time to reinstall it. This process is straightforward and easy to follow. Here are the steps to take:
- Take the cleaned coil and screw it back into the device. Make sure it’s screwed in tightly, but don’t over-tighten it.
- Reattach the other parts of the device in the reverse order that you took them off. This may include the tank, mouthpiece, and any other parts that were removed during the cleaning process.
- Fill the tank with e-liquid. Be careful not to overfill it, as this can cause leaks.
- Let the device sit for a few minutes to allow the e-liquid to soak into the coil. This will help prevent dry hits and burnt coils.
- Turn the device on and take a few test puffs to make sure everything is working properly.
By following these simple steps, you can reinstall your vape coil and enjoy a clean, flavorful vaping experience. Remember to clean your vape coil regularly to maintain optimal performance and extend its lifespan.
Sure, here’s your section:
Maintaining Your Vape Coil
As a vaper, it’s important to maintain your vape coil to ensure it lasts as long as possible and delivers the best possible vaping experience. A dirty or clogged coil can negatively impact the flavor and vapor production of your device, so it’s important to clean your coil regularly.
There are a few different methods for cleaning your vape coil, but the most common is to soak it in a cleaning solution. You can use a commercially available cleaning solution or make your own by mixing equal parts water and vinegar. Soak your coil in the solution for several hours, then rinse it thoroughly with water and let it dry completely before using it again.
Another option is to use a dry burn method, which involves heating your coil until any residue or debris burns off. To do this, remove your wick and dry burn your coil by pulsing your device at a low wattage until the coil glows red. Be sure to blow on the coil to remove any ash or debris, then rinse it with water and let it dry completely before using it again.
In addition to cleaning your coil, there are a few other things you can do to maintain it. First, make sure to use high-quality e-liquid that won’t leave residue or gunk on your coil. Second, avoid using your device at a wattage that is too high for your coil, as this can cause it to burn out more quickly. Finally, replace your coil regularly, as even with proper maintenance, they will eventually wear out and need to be replaced.
By following these simple tips, you can maintain your vape coil and enjoy a great vaping experience for longer.
Safety Precautions
When cleaning your vape coil, it is important to take certain safety precautions to avoid accidents and ensure that your device is not damaged in the process. Here are some things to keep in mind:
- Turn off your device: Before cleaning your vape coil, turn off your device and remove the battery to avoid any electrical accidents.
- Wear gloves: When handling e-liquids or cleaning agents, it is important to wear gloves to protect your skin from irritation or chemical burns.
- Choose the right cleaning agent: Avoid using harsh chemicals or cleaning agents that are not specifically designed for vaping devices. Stick to mild detergents or isopropyl alcohol to clean your vape coil.
- Avoid water damage: While cleaning, make sure that water or cleaning agents do not enter the battery compartment or any other electronic components of your device. This can cause serious damage to your device.
- Be gentle: When cleaning your vape coil, use gentle, circular motions and avoid using excessive force. This will prevent damage to the coil and ensure that it lasts longer.
By following these safety precautions, you can ensure that your vape coil is cleaned properly and safely, and that your device is not damaged in the process.
Frequently Asked Questions
How do I clean my vape coil without ruining it?
Cleaning your vape coil without ruining it requires a delicate touch. You can start by disassembling your vape and removing the coil from the tank. You can then use a dry paper towel to wipe off any excess e-liquid or debris. Next, you can soak the coil in a bowl of distilled water for a few hours to help remove any stubborn buildup. After soaking, you should carefully pat the coil dry with a clean cloth or paper towel. Make sure it is completely dry before moving on to the next step. Finally, you can dry burn the coil by pulsing the power button on your vape mod until the coil glows red-hot. This will help burn off any remaining residue.
What is the best way to clean vape coils?
The best way to clean vape coils depends on personal preference. Some people prefer to clean their coils with a dry paper towel, while others prefer to soak their coils in a bowl of distilled water. You can also clean your coils with solvents like rubbing alcohol or vinegar. Whatever method you choose, make sure to handle your coils gently and avoid damaging them.
Can you clean disposable vape coils?
Disposable vape coils are not designed to be cleaned. They are meant to be used once and then thrown away. If you try to clean a disposable vape coil, you are likely to damage it or reduce its effectiveness.
Is it okay to wash a vape coil with water?
It is okay to wash a vape coil with water, as long as you are careful not to damage it. You should never use hot water or soap to clean your coil, as this can damage the delicate metal wires inside. Instead, use distilled water and handle your coil gently.
Can you clean a burnt vape coil?
It is possible to clean a burnt vape coil, but it is not recommended. Burnt coils are usually damaged beyond repair and should be replaced. If you try to clean a burnt coil, you are likely to damage it further or reduce its effectiveness.
Can I clean my vape coils with rubbing alcohol?
Yes, you can clean your vape coils with rubbing alcohol. Rubbing alcohol is a common solvent used to clean vape coils. However, you should be careful not to soak your coils in rubbing alcohol for too long, as this can damage the delicate metal wires inside. Additionally, make sure to rinse your coils thoroughly with distilled water after cleaning with rubbing alcohol.