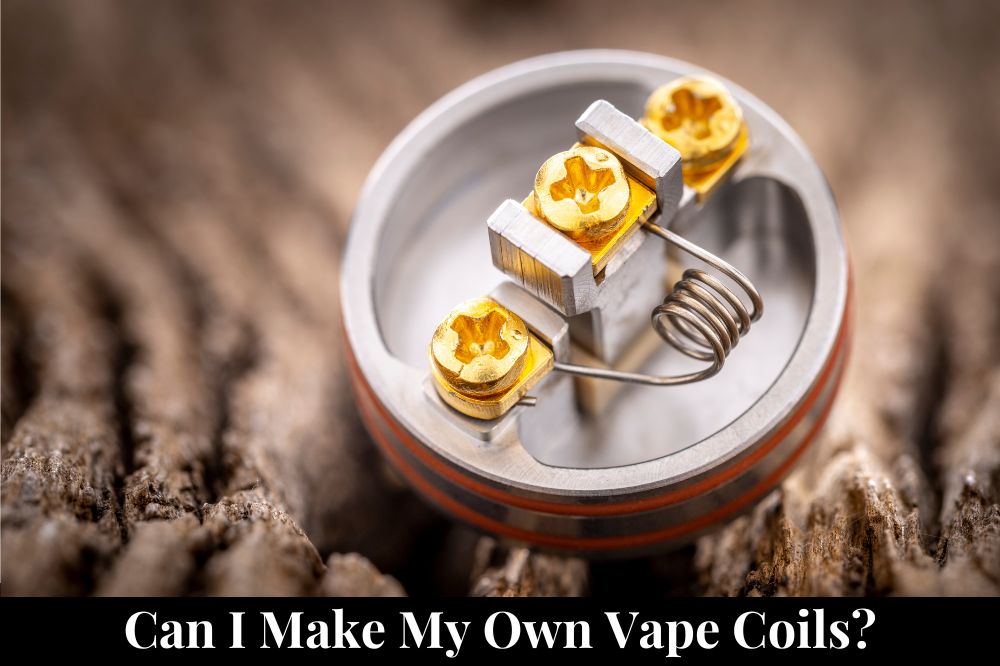
If you are a vaper, you may have heard about coil building. It is a process of creating your own vape coils from scratch using wire and cotton. Building your coils can be a fun and rewarding experience, as it allows you to customize your vaping experience and save money in the long run. But can you make your own vape coils? The answer is yes, you can.
Making your own vape coils can seem daunting at first, but with practice, it can become an enjoyable hobby. Not only does it give you more control over your vaping experience, but it can also save you money in the long run. Instead of buying disposable coil heads every week, you can make your own coils that can last for months with proper maintenance.
There are many benefits to building your vape coils, but it is important to note that it requires some knowledge and experience. Before you start building your coils, it is essential to research and understand the process thoroughly. This article will guide you through the basics of coil building and provide you with the necessary information to get started.
What Are Vape Coils?
If you’re new to vaping, you may be wondering what vape coils are. Vape coils are the heating elements that are responsible for turning e-liquid into vapor. They are typically made of wire that is wrapped into a coil shape, and they come in a range of different materials, including kanthal, stainless steel, nickel, and titanium.
The coil is then connected to the positive and negative terminals of the atomizer, and when you press the fire button on your device, it heats up and vaporizes the e-liquid. The size and shape of the coil, as well as the type of wire used, can all affect the performance of your device.
Some vapers prefer to make their own coils, as it allows them to customize their vaping experience. However, building your own coils can be a bit of a learning curve, and it’s important to ensure that you have a good understanding of ohm’s law and battery safety before attempting to build your own coils.
Overall, vape coils are an essential component of any vaping device, and understanding how they work can help you to get the most out of your vaping experience.
Why Make Your Own Vape Coils?
If you’re a vaper, you know that the coil is a crucial component of your vaping device. It’s responsible for heating up the e-liquid and turning it into vapor that you inhale. While most vapers buy pre-made coils, there are several reasons why you might want to consider making your own.
Cost Savings
One of the biggest advantages of building your own vape coils is cost savings. Pre-made coils can be expensive, especially if you go through them quickly. Making your own coils can save you a significant amount of money in the long run. You can purchase the materials needed to make your own coils in bulk, which can further reduce the cost.
SPIRITBAR Katana BP10000
- Slender, leather-textured body reminiscent of a katana handle for an authentic samurai feel
- Unique samurai-inspired e-liquid flavor - fruity yet not too sweet, with a luxurious, elegant aroma
- Powerful 650mAh rechargeable battery for extended vaping time
- Large 18ml e-liquid capacity and 10,000 puff capacity
- Advanced mesh coil and e-liquid & power display screens for optimal vaping experience
The special juice captures the essence of the samurai spirit with its rich, smoothly pulsating flavor that brings new satisfaction with every puff. The device's slender, leather-textured design evokes the grip of a samurai's katana, making this product a perfect choice for beginner vapors.
Customization
Another advantage of building your own vape coils is customization. When you make your own coils, you have complete control over the resistance, size, and number of wraps. This allows you to fine-tune your vaping experience to your liking. You can experiment with different materials, such as kanthal, stainless steel, and nickel, to achieve different flavors and vapor production.
Satisfaction
Building your own vape coils can also be a satisfying hobby. It allows you to take ownership of your vaping experience and gives you a sense of accomplishment when you successfully build a coil that performs well. It’s a fun and creative way to enhance your vaping experience and express your individuality.
Learning Experience
Finally, building your own vape coils can be a great learning experience. It requires some basic knowledge of electronics and physics, which can be a great opportunity to learn new skills. You’ll also learn about the different materials and tools used in coil building, which can be helpful if you ever need to troubleshoot issues with your device.
Overall, building your own vape coils can be a cost-effective, customizable, and satisfying way to enhance your vaping experience.
SPIRITBAR Jack’s Flask 9000 Puffs
- Stylish pirate flask-shaped body providing an exciting vaping experience
- Delivering up to 9000 puffs per device
- 20ml e-liquid capacity with 50mg nicotine strength for satisfying throat hit
- Specialized pirate-themed e-juice flavors for rich, swirling taste
- Premium mesh coil optimizes flavor profile for maximum vaping enjoyment
This disposable vape captures the daring spirit of the high seas with its flask styling and signature pirate e-juice flavors. The extraordinary battery life provides 9000 indulgent puffs for extended vaping pleasure. Live boldly and freely with the Jack's Flask - a legendary vaping experience fit for a pirate's adventures.
Essential Materials for Making Vape Coils
If you’re interested in making your own vape coils, you’ll need a few essential materials to get started. Here are the three main things you’ll need:
Wire
The first thing you’ll need is wire. Wire comes in different materials, such as Kanthal, Stainless Steel, and Nickel. Each material has its own unique properties that affect the resistance and flavor of your vape coil. Kanthal is the most commonly used wire material because it’s easy to work with and has a high melting point. Stainless Steel is another popular choice because it’s durable and produces a clean flavor. Nickel wire is used for temperature control vaping.
When choosing wire, make sure to select the right gauge for your coil. The gauge determines the thickness of the wire, which affects the resistance of the coil. A lower gauge wire will have a thicker diameter and lower resistance, while a higher gauge wire will have a thinner diameter and higher resistance.
Coiling Tool
The next thing you’ll need is a coiling tool. A coiling tool helps you wrap the wire into a coil shape. Coiling tools come in different sizes, so make sure to choose one that matches the diameter of your wire. A coiling tool can be a simple rod or a more complex device that helps you wrap the wire into a specific shape, such as a Clapton coil.
Cotton
The final thing you’ll need is cotton. Cotton is used to wick the e-liquid from the tank to the coil. There are different types of cotton available, such as organic cotton and Japanese cotton. Organic cotton is unbleached and doesn’t contain any chemicals, while Japanese cotton is known for its high absorption rate and clean taste.
When wicking your coil, make sure to use the right amount of cotton. Too little cotton can cause dry hits, while too much cotton can restrict the flow of e-liquid. A good rule of thumb is to use enough cotton to fill the coil but not so much that it’s tight or difficult to move.
With these essential materials, you’ll be well on your way to making your own vape coils. Remember to choose the right wire, use a coiling tool, and wick with cotton for the best results.
Step by Step Guide to Making Vape Coils
Making your own vape coils can be a fun and rewarding experience. Here is a step-by-step guide to help you get started.
Choosing the Wire
The first step in making your own vape coil is choosing the right wire. There are several different types of wire to choose from, including Kanthal, Nickel, Stainless Steel, and Titanium. Each type of wire has its own unique properties and can affect the flavor and vapor production of your vape.
Kanthal wire is the most common type of wire used for building vape coils. It is easy to work with and is available in a wide range of gauges. Nickel, Stainless Steel, and Titanium wire are also popular choices for building vape coils.
When choosing your wire, it is important to consider the resistance of the wire. Lower gauge wires have a lower resistance, which means they will heat up faster and produce more vapor. Higher gauge wires have a higher resistance, which means they will heat up slower and produce less vapor.
Coiling the Wire
Once you have chosen your wire, it’s time to start coiling. You will need a coiling tool to help you wrap the wire into a coil. There are several different types of coiling tools available, including screwdrivers, drill bits, and specialized coil jigs.
SPIRITBAR Katana BP10000
- Slender, leather-textured body reminiscent of a katana handle for an authentic samurai feel
- Unique samurai-inspired e-liquid flavor - fruity yet not too sweet, with a luxurious, elegant aroma
- Powerful 650mAh rechargeable battery for extended vaping time
- Large 18ml e-liquid capacity and 10,000 puff capacity
- Advanced mesh coil and e-liquid & power display screens for optimal vaping experience
The special juice captures the essence of the samurai spirit with its rich, smoothly pulsating flavor that brings new satisfaction with every puff. The device's slender, leather-textured design evokes the grip of a samurai's katana, making this product a perfect choice for beginner vapors.
To coil your wire, simply insert one end of the wire into the coiling tool and wrap the wire around the tool until you have the desired number of wraps. Be sure to keep the wraps tight and evenly spaced.
Inserting the Coil
After you have coiled your wire, it’s time to insert the coil into your vape. First, remove the old coil from your vape and clean the coil housing. Then, insert the new coil into the housing, making sure that the leads are properly aligned with the posts.
Once the coil is in place, use a screwdriver or other tool to tighten the screws on the posts, securing the coil in place.
Wicking the Coil
The final step in making your own vape coil is wicking the coil. To do this, you will need a piece of cotton or other wicking material. Cut the wick to the appropriate length and insert it through the center of the coil.
Be sure to fluff the ends of the wick and tuck them into the juice well. This will help ensure that the wick is properly saturated with e-juice and will provide a smooth and flavorful vape.
That’s it! With a little practice, you can become an expert at making your own vape coils and enjoy a customized vaping experience.
Safety Precautions When Making Vape Coils
When it comes to making vape coils, safety should always be your top priority. Here are some important safety precautions to keep in mind:
1. Use Proper Tools
Before you start building your coils, make sure you have the proper tools. This includes wire cutters, pliers, and a coil jig. Using the right tools will not only make the process easier, but it will also reduce the risk of injury.
2. Choose the Right Wire
When selecting wire for your coils, it is important to choose the right gauge and material. The gauge will determine the resistance of your coil, and the material will affect the flavor and vapor production. Be sure to do your research and choose a wire that is suitable for your device and preferences.
3. Check Your Battery
Before building your coils, it is important to make sure your battery is in good condition. Check for any signs of damage or wear, and make sure it is properly charged. Using a damaged or improperly charged battery can be dangerous and cause harm.
4. Build Within Safe Limits
When building your coils, it is important to stay within safe resistance limits. This will vary depending on your device and battery, so be sure to check the specifications and do the calculations before building. Building outside of safe limits can be dangerous and cause harm.
5. Practice Proper Handling
When handling your coils, be sure to practice proper safety techniques. This includes wearing gloves, avoiding contact with your skin and eyes, and using caution when handling hot coils. Mishandling your coils can cause injury or harm.
By following these safety precautions, you can enjoy the process of building your own vape coils while also staying safe and avoiding injury.
Benefits of Making Your Own Vape Coils
Making your own vape coils has several benefits that make it a worthwhile activity for vapers. Here are some of the advantages of building your own vape coils:
Cost-Effective
One of the most significant benefits of making your own vape coils is that it can save you money in the long run. Disposable coil heads can be expensive, and they need to be replaced regularly. By building your own coils, you can save money on replacement costs and have a more sustainable vaping experience.
Customizability
Another advantage of making your own vape coils is that it allows you to customize your vaping experience. You can experiment with different wire types, coil sizes, and resistances to find the perfect balance of flavor and vapor production. With practice, you can fine-tune your coils to your specific preferences and create a unique vaping experience.
Fun and Rewarding
Building your own vape coils can be a fun and rewarding hobby. It requires some patience and practice, but the satisfaction of creating something with your own hands is worth it. Plus, you get to enjoy the fruits of your labor every time you take a puff.
Better Flavor
When you make your own vape coils, you have more control over the flavor of your e-juice. By experimenting with different coil configurations and wire types, you can enhance the flavor profile of your favorite e-liquids. Plus, since you’re not using disposable coil heads, you won’t have to worry about any residual flavors from previous e-juices.
Longer Lifespan
Finally, making your own vape coils can extend the lifespan of your vaping device. Since you’re not using disposable coil heads, you won’t have to replace them as often. This can save you money in the long run and reduce waste.
Overall, making your own vape coils is a fun and rewarding activity that can save you money, enhance your vaping experience, and reduce waste. With some practice and experimentation, you can create the perfect coils for your specific preferences and enjoy a more sustainable vaping experience.
Challenges of Making Your Own Vape Coils
Making your own vape coils can be a fun and rewarding experience, but it’s not without its challenges. Here are a few things to keep in mind if you’re thinking about building your own coils:
1. Learning Curve
Building your own coils requires some technical knowledge and experience. You need to understand Ohm’s law, coil resistance, and the different types of wire available. It can take some time to get the hang of it, but with practice, you can become proficient.
2. Time and Effort
Making your own coils is not a quick process. It takes time to wrap the wire around a mandrel, install the coil into your atomizer, and wick it properly. You’ll also need to clean your atomizer regularly to maintain the best flavor and vapor production.
3. Cost
While building your own coils can save you money in the long run, there is an upfront cost to getting started. You’ll need to purchase wire, cotton, and tools like wire cutters and pliers. The cost can add up quickly, especially if you want to experiment with different types of wire and coil configurations.
4. Safety
Building your own coils can be dangerous if you don’t take the proper precautions. You need to be aware of the risks of short circuits and battery safety. Always use a regulated mod and check your coil resistance before firing your atomizer. If you’re not comfortable with the process, it’s best to stick with pre-made coils.
Overall, making your own vape coils can be a rewarding experience, but it’s not for everyone. If you’re willing to put in the time and effort to learn the process, you can achieve better flavor and vapor production than with pre-made coils. However, it’s important to be aware of the challenges and risks involved.